Mysql Database backup script.

I have found this one mysql backup script, that just suite my need to backup all database in their respective file. It will be easy for recovery, if I need the sql for that particular database. This is script have been modified from mysql database backup script in HowToForge. This script will also FTP to other location, but I have remove this functionality, as I dont need to move it to another FTP server.

#!/bin/sh
# System + MySQL backup script
# Copyright (c) 2008 Marchost
# This script is licensed under GNU GPL version 2.0 or above
# Modified by Farhan Faisal @ farhanfaisal.com
# ---------------------------------------------------------------------

#########################
######TO BE MODIFIED#####

### System Setup ###
BACKUP=YOUR_LOCAL_BACKUP_DIR

### MySQL Setup ###
MUSER=”MYSQL_USER”
MPASS=”MYSQL_USER_PASSWORD”
MHOST=”localhost”

### FTP server Setup ###
FTPD=”YOUR_FTP_BACKUP_DIR”
FTPU=”YOUR_FTP_USER”
FTPP=”YOUR_FTP_USER_PASSWORD”
FTPS=”YOUR_FTP_SERVER_ADDRESS”

######DO NOT MAKE MODIFICATION BELOW#####
#########################################

### Binaries ###
TAR=”$(which tar)”
GZIP=”$(which gzip)”
FTP=”$(which ftp)”
MYSQL=”$(which mysql)”
MYSQLDUMP=”$(which mysqldump)”

### Today + hour in 24h format ###
NOW=”$(date +”%Y-%m-%d”)”

### Create hourly dir ###

mkdir $BACKUP/$NOW

### Get all databases name ###
DBS=”$($MYSQL -u $MUSER -h $MHOST -p$MPASS -Bse ‘show databases’)”
for db in $DBS
do

### Create dir for each databases, backup databases in this folder. ###
FILE=$BACKUP/$NOW/$db.sql.gz
$MYSQLDUMP -a -u $MUSER -h $MHOST -p$MPASS $db | $GZIP -9 > $FILE
done

### Compress all tables in one nice file ###

ARCHIVE=$BACKUP/$NOW.tar.gz
ARCHIVED=$BACKUP/$NOW

$TAR -zcf $ARCHIVE $ARCHIVED

rm -rf $ARCHIVED

http://www.howtoforge.com/shell-script-to-back-up-all-mysql-databases-each-table-in-an-individual-file-and-upload-to-remote-ftp
Last weekend waterfall hunting.

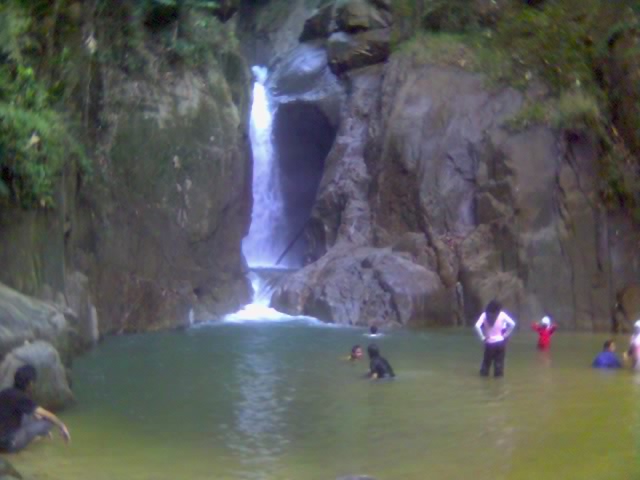
Last weekend was a great weekend, as I did one new thing, waterfall hunting. I have marked 2 waterfall to search for, both of them found in a website, http://www.waterfallsofmalaysia.com. Its Tanglir Waterfall, and Sungai Dua waterfall. Both of them just within the same path on Karak Highway. Anyway, It start will a warm up trip to Chilling Waterfall with my rock climbing friends.

Chilling waterfall
Chilling waterfall located in Kuala Kubu Bharu. After reaching there, we park our car, and start tracking to the base site, where there were the management office, campsite, toilets and place to pray. The place is well maintained, as it is a fish sanctuary area. Thats why, fishing is strictly not allowed in Chilling Waterfall. You can see the signboard throughout the path.

After 40 minutes walk, just following the path upriver and 5 river crossing, we reached the fall at around 3.30 pm. The waterfall is just fantastic. I remember last time i went there, we did canyoneering near the fall. We spend around 1 1/2 hours there, and start departing back to campsite. There were some strict rules, like you cannot camping there beyond the hanging bridge, and you have to get back before 5 o’clock. You also cannot swim there if its raining. There have been a few accident there, that involves death.

GPS navigator

Continue reading

Bukit Tabur, Taman Melawati

Bukit Tabur, Sunrise

Picture by Alexander Krasnikov

Within last few weeks, I’ve been to Bukit Tabur. Could not find more time for long trip, other than usual rock climbing during weekends, and Bukit Tabur trip. It start with my colleague, who would like to try out some adventures during weekends.

On 20th December, we start hiking the hill at 6.30, just 4 of us, because 5 others were late. We dont waste the opportunity to see the sunrise. Within 25 minutes, we arrive there. Its still dark, and we still have to use our headlights to walk. Then I returned back, and wait for the other 5 of us to arrive. We managed to reach the others around 7.30. Its not so hot yet, and we can still enjoy the sunrise that time.

The trip was planned for only to enjoy the sunrise, but we could not hold ourself seeing other trackers moving with the passion to the top. I never reach the peak, the real peak, and neither all of us. We just follow some other trackers that time.


Ima, at Bukit Tabur
Following few weeks, there comes another trip, for my other friends. They missed the 1st trip, because of health condition. Well, I keep my promise to bring them there 🙂 Its not as early as the previous trip, but we enjoy the trip, enjoy the sunrise, and enjoy the view from there. For last few trip to Bukit Tabur, I really want to just enjoy the view, and the cold winds. Its just feels like at the top of mountains, just with 20-30 minutes walk.
Continue reading

Use Google Apps on your own domain.

As google have introduced to their google apps to all users for free, I think a simple guide on how to utilize the free service to our optimum use.. This should be a reference for me myself, and other who would see this useful.

For me, I would just want to use google mail, as inside google apps package. Google mail really a good thing we have in the internet world nowadays, as the email interface, emailing experience is different, and really useful. Just a few cons like no folder management. But you can still use labelling to categorize your email.

There are 2 ways you can use google mail on your own domain. Either registering for google apps at http://www.google.com/a/ or using your current gmail email account.

Using google apps.

Go to http://www.google.com/a/, and register for google apps account with your domain name. With google apps, you can have google docs, google chat, google site, calendar and a few more. But this example, google site will be ignored, as I’m using my current hosting account for site, I’m just using Google Mail in my google apps.

Register for your domain name
After the registration process, you will have to verify domain ownership. You can choose either 1 of 2 method, either configuring your MX record, your html verification. I think HTML verification will be easier, as you can simply create the file, with specific filename and content provided by Google, on your hosting account, and Google with check the file later.

After your google apps have been created, you need to modify your DNS record of your domain, specifically your MX record to tell where emails of your domain to be sent to. Please check it here, http://www.google.com/support/a/bin/answer.py?hl=en&answer=33352. You can just refer below, the list of MX record to be changed.

MX Server address Priority
ASPMX.L.GOOGLE.COM. 10
ALT1.ASPMX.L.GOOGLE.COM. 20
ALT2.ASPMX.L.GOOGLE.COM. 20
ASPMX2.GOOGLEMAIL.COM. 30
ASPMX3.GOOGLEMAIL.COM. 30
ASPMX4.GOOGLEMAIL.COM. 30
ASPMX5.GOOGLEMAIL.COM. 30

Google also suggest you to add this additional SPF Continue reading

Change process priority with renice

Today I discovered a very slow loading of a few website of mine. For apache, I have reading through and made some tweaks and optimization to make it perform better. On database, not much that I’ve done. I use mytop, a mysql health monitor just like top in linux system. Its shows a few queries hanging and queued.

Apache and mysql need a higher priority to serve the web faster, as fast as it could. I found a tutorial on renice, where we can change the process priority of process, and also for any process that belong to any particular user. The value varies from -20 until 19. The negative value only can be assigned by a superuser. The lower the value, higher the priority. For example, process with value -19, have a higher priority than a process with nice value -18.

to change the nice value, it could be as simple as :

nice -5 httpd
* this will change process httpd priority to 5.

You can also change the priority by user.

renice -5 -u mysql
* This will change the priority of all process that belong to user mysql to -5

renice -5 -u mysql -p 8918
* This will change the priority of all process that belong to user mysql and with PID 8918 to -5.

http://www.newlinuxuser.com/howto-change-a-running-processes-priority-with-renice/
http://jeremy.zawodny.com/mysql/mytop/
Renice – Linux man page http://linux.die.net/man/8/renice

Monowall on Vmware

NA-0042B.gifmonowall_in_vmware.jpgmonowall_screen.jpg
Yesterday I spent some time to play around with Monowall. Monowall is an embedded firewall package, thats built from bare-bone version of FreeBSD. The whole package is really small, smaller than 12MB, it can fit into your CF card for your embedded project. I start to have a look into Monowall when my boss bring this machine into our office, an embedded box, Axiomtek NA-0042B. I couldn’t find any technical spec in detail of the product, even from the official Axiomtek website.

So, in my case, I’m using a generic-pc image, from one of the monowall mirrors. I load the image into another vmware virtual machine, load the image into a secondary image of the machine.

The disk is available for download here Monowall Disk for VMware. I’ve also prepared a complete vmware machine with monowall. Please download it here, Monowall VMware Image.. This machine have been configured with IP 192.168.1.254. Username & password are the same as default, admin and mono respectively.

I’ll have a look into IpCop and pfSense later. Never get my hands tired with them yet. Maybe some other Monowall derivative as well 🙂

monowall_pfsense.gifmonowall_freenas.gifmonowall_askoziapbx.gif
[download(Monowall Disk for VMware)] (5.4MB), [downloadcounter(Monowall Disk for VMware)] downloads.
[download(Monowall VMware Image.)] (5.4MB), [downloadcounter(Monowall VMware Image.)] downloads.

Picasa LigthBox 2 WordPress Plugin

add_picasa_photo.jpglightbox_preview.jpg

While figuring out how to manage my pics, and easy insert into my blog post, I found this plugin. Picasa LigthBox 2. This plugin will retrieve our public pictures from picasa gallery, and have an easy interface to include them into our blog post. Besides, it provides a overlay preview to our users, using WordPress Lightbox Plugin.

Just put the WordPress Lightbox2 plugin into your wp-content/plugins/, activate it in WordPress Admin page. Do the same thing for Picasa Lightbox 2 plugin. Put into your plugin folder and activate it. After that, you can see a small button to add new picasa photo.

http://bogde.ro/computers/picasa-ligthbox-2-preview.htm
http://zeo.unic.net.my/notes/lightbox2-for-wordpress/

iDuino – Arduino compatible prototyping board


HPIM0189.jpg

Hai.. Long time again since my last post. Just updated something, for my own notes, and anyone who an share this.

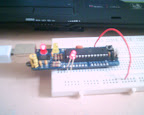
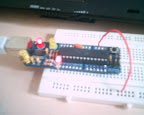
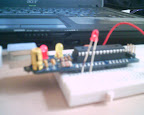
Last few month I have bought a electronic prototyping platform, which contains a mictrocontroller Atmega168. The board I bought was iDuino, a derivative from another electronic platform, that is Arduino. They are open source hardware and software platform, where you can customize the microcontroller to do almost anything. But right now, I just can blink the light 🙂

This is the iDuino board, a similar version of Arduino Diecimila. I just use the Arduino programming software, Arduino tutorial to start with the board. The only reason I bought iDuino instead of Arduino because its cheaper 🙂

iDuino is a breadboardable version. So, you can test your own circuit directly on a breadboard. There are a few version of Arduino you can choose from, according to your project need. This iDuino is a good start, and surely I will learn alot from it. It took me almost 4 month to get started, because of busy work. From beginning, i start buying tools, completing my toolbox, and now i have the time to play around with it.

I bought a unsoldered board iDuino, it took me almost one hour to solder them, and test it the other day. The board is connected to PC using USB, utilizing FT232RL, the same as in Arduino. So, I need to install USB Serial Converted driver, provided in Arduino programming software package. Arduino software provided with some sample code, and sample wiring to get started. At first when I try to load up a “blink” code, it gives me an error,

avrdude: stk500_getsync(): not in sync: resp=0x00
avrdude: stk500_disable(): protocol error, expect=0x14, resp=0x51

I search around, and found the solutions in Arduino forum. i just need to go to Device Manager –> Ports, there is a USB serial port. At first it was mapped to Port 15. Go to its properties, Port Setting, Advance, change the port number to something below 10. Then change the port in Arduino software to what you have change, through Tools –> Serial Port. Now I can start the coding and projects. 🙂

There is one guy who already proposing for a sumo challenge, in Ittutor forum. I dont know when I can get involve. I’m a newbie. huhuh.. Tunggu Bro Rizal, bagi saya blaja dulu 🙂

Just an update..

Hai everyone.

It seems a long time since I wrote in my own blog. So busy with life, no activity to post in yet. Btw, I’m thinking there might be something I could share with you guys.

These are a few website I’ve been alot lately. I’m into web development, PHP & Jquery.

http://www.noupe.com/ – Good blog related to web development and design
http://www.problogdesign.com/ – Have good articles on web design and wordpress.
http://nettuts.com/
http://www.devsnippets.com/ – Collection of good tutorials on web development, mostly Ajax, CSS and JS framework.
http://www.smashingmagazine.com/ – This site have a good design articles. Web designers, photographers, you should subscribe to this blog.

I’m planning to develop a new website, my own, from scratch. Previously I’ll just use CMS like Joomla and wordpress. Build it from scratch, I have the freedom to see it the way I want. But still, I’m not good in designing actually.

These are a few website I’ve done for past few month
http://www.iratec.com.my
http://www.amaidnetwork.com
http://www.pmo.gov.my

There are a few more to go:
http://www.wahtec.com
http://www.palmaritime.com.my

Will update more soon..

Web 2.0 button – Photoshop tips

square-button-farhanfaisal.jpg
I just found a new Photoshop tutorial, Its a simple tutorial, to create a Web 2.0 button for your website. It will look like glossy crystal look, some kinda elegant. The article is available here[dead link now].

The tutorial is simple, showing a few suggestion on blending options that needed to give the glossy look. You will find it very easy 🙂 Eventhough I’m not really into graphic and multimedia stuff. Huhuhu..

http://www.xtutorial.info/2007/11/19/13/